Access Methods
Access Methods determine the way Queue Control Console communicates with the GDS via Galileo Web Services. Queue Control Console requires a Host Access Profile, also referred to as HAP, before a customer can start using the product. These credentials will be added in the access method.
Note: When an agency has access to multiple GDS HAP/Universal API credentials, a different Schedule can be created for each access method. For instance, set one Schedule to run an access method per GDS. The user is able to select any access method regardless if it’s Travelport Galileo, Travelport Apollo and/or Travelport Worldspan for initiating any action; however Queue Control Console only provides actions based on the access method selected on the previous action. Therefore, if first action uses a Travelport Galileo access method, then the rest of actions for that schedule would need to use the Travelport Galileo access method.
For users of agencies for which the Service Bureau functionality has been enabled, contact Travelport support to configure Access Methods for your respective agencies.
However such agencies and their users can view the existing handler(s) associated with their agency and can also modify, delete, deactivate, or activate the same on an as needed basis.
-
Click the Access methods tab.
-
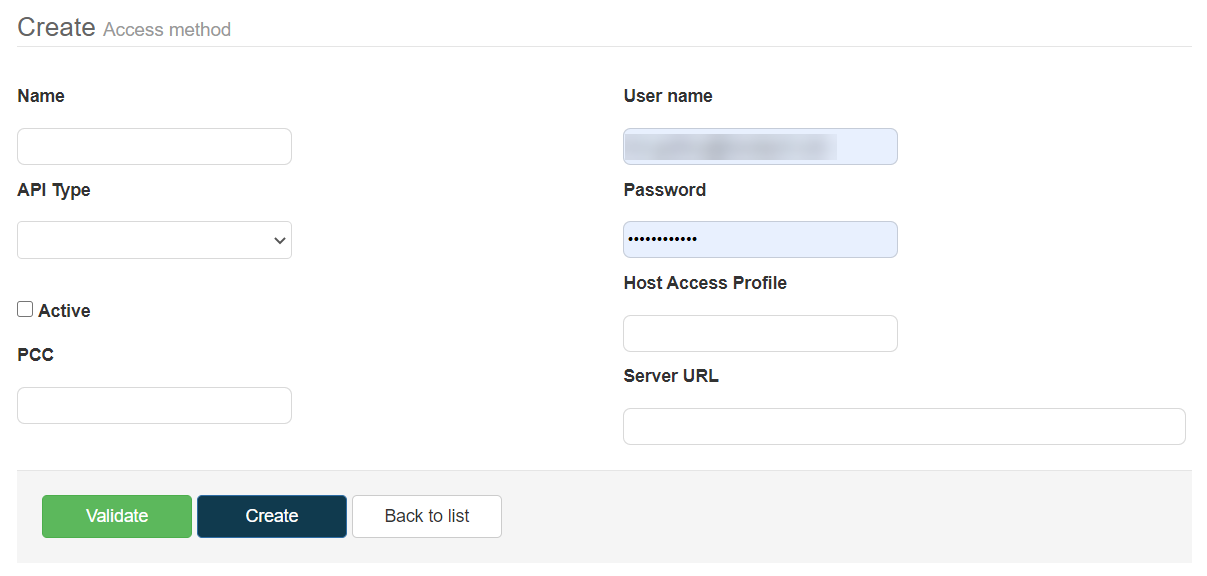
Click the New access method button. The Create Access Method screen displays (select image to enlarge).
-
Enter a name for the access method (e.g., E9G Production).
-
Select the GDS in the API Type list.
-
Select Active if the new access method is active.
-
Enter the Pseudo City Code.
-
The user name and password default to your Queue Control Console credentials. Replace these credentials with your HAP user name and password. If needed, contact a Travelport Account Manager to assist.
-
Enter the server URL. If needed, contact a Travelport Account Manager to assist.
-
Click the Validate button. If the information was entered correctly and is recognized by the web service, a successful message displays. Otherwise, ensure your credentials and other information have been entered correctly. If needed, contact a Travelport Account Manager to assist.
-
Click Create to create the new, validated access method.
The new access method is now available to be used to create Schedules.